Apex NF600 Rangefinder
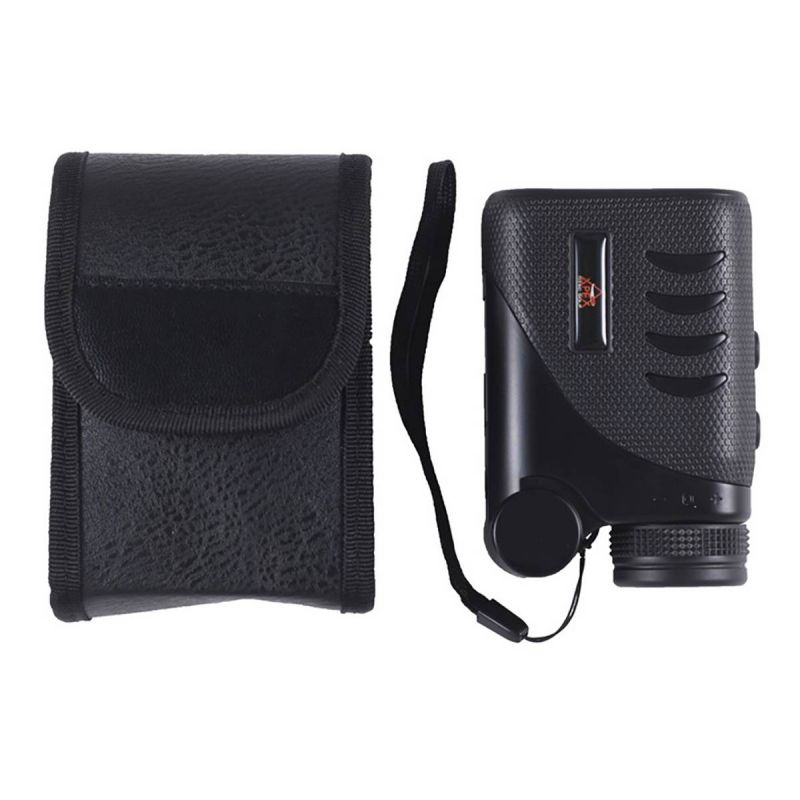
The Apex Rangefinder is designed specifically for disc golf!
This unit measures in feet so you can be sure to get an exact measurement to the pin and adjust your disc selection and throwing style accordingly. The Apex Rangefinder has an impressive 6X optical zoom that can accurately measure distances between 10 and 2,000 feet away, well more than necessary for even the longest disc golf course. It helps you measure slope so that you can adjust your throws based on uphill or downhill gravity effects. The rangefinder even has a built in speed gun. However, this is difficult to use on small objects like flying discs.
Here is the rundown and instruction manual on how to use the Apex Rangefinder:
How it works
The Apex Rangefinder NF-600 uses a 905 nanometer Class 1 laser that is invisible and safe for human eyes. To take a measurement, the Apex Rangefinder emits a laser burst and calculates the time it takes to bounce off the object being measured and return. The time is then calculated to determine the distance from the Apex Rangefinder to the object. Internal electronics are used to measure the angle difference from the horizontal plane.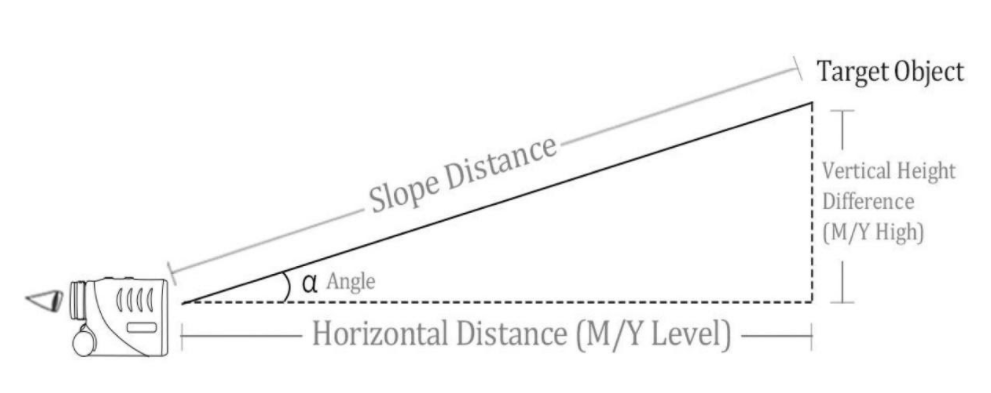
This laser will work by pointing at any object at a distance more than 10 but less than 2,000 feet.
How to use the Apex Rangefinder
Press the Power button to turn on device. An LED reticle will appear in the eyepiece (The reticle is the cross that shows up in the center of the eyepiece. It is used to line up the object being measured to the center of the eyepiece.)
Line up the center of the reticle on the object you want to measure.
Press the Power button again to take the measurement. The distance from the Apex Rangefinder to the object will appear above the reticle.
To change modes, press the Mode button. The mode types will appear below the reticle.
To change the measurement unit type (Yards, Feet, or Meters), turn on the Apex Rangefinder then press and hold the power and mode buttons simultaneously until the desired unit of measure appears below the reticle. The default distance mode is feet.
The Apex Rangefinder will automatically shut off after about 25 seconds of non-use.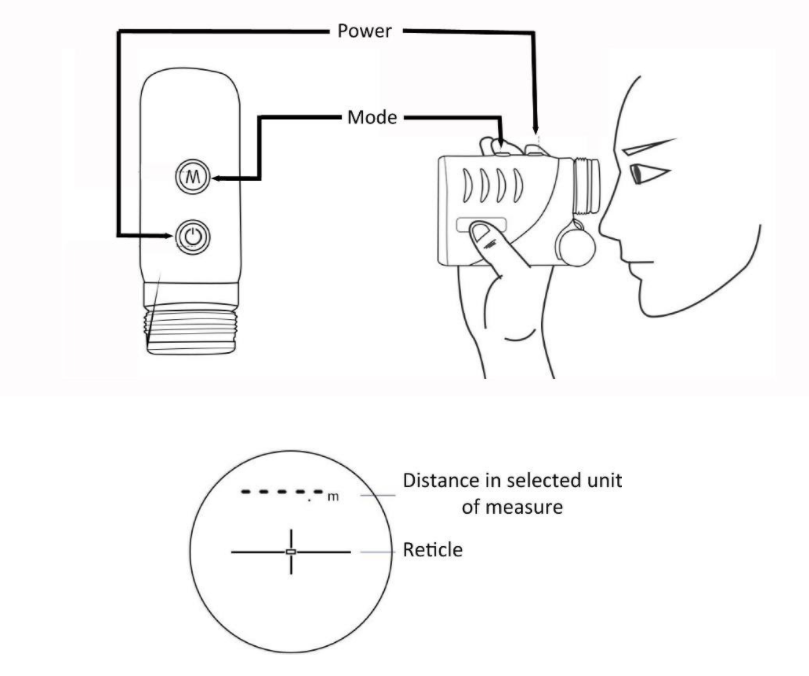
When to use the different modes (see below for instructions for each mode):
1. Slope Distance – Finds the distance from the Apex Rangefinder to an object. The Apex Rangefinder is automatically in Slope Distance mode when initially turned on.
2. VD – (Vertical Distance) Measures distance, elevation difference, and angle from Apex Rangefinder to object.
3. HD – (Horizontal Distance) Measures continual slope distance, angle, and horizontal distance (the distance to a point above or below the object, at a horizontal plane to the Apex Rangefinder). The measurements will be updated continually, as the Apex Rangefinder is pointed at different objects.
4. SP – (Speed Measurement) Measures the speed of an object between two points. Object must be travelling toward or away from Apex Rangefinder.
5. HT – (Height Measurement) Measures the height difference between two objects.
6. CL and FA (Closest and Farthest) Measures the distance of several different objects. Displays the Closest point (CL) or Farthest point (FA).
7. Distance Compensation Mode (Golf flag symbol) Measures the recommended throwing distance to an object. In other words, if the basket is 300 feet away, and up a steep hill, you will have to throw with the power of a 350-foot throw to get it up to the basket.
8. Storage mode – (Lb will show at the bottom of the viewfinder) Use this mode to scroll through the last 20 readings. This could help if you want to see the distances of the last objects that you measured. Displays the most recent distance first.
How to Use the Modes
SD – Slope/Distance Mode. Measures the distance from the Apex Rangefinder to an object. In this mode, nothing is displayed below the reticle. When the Apex Rangefinder is turned on, it starts out in Slope/Distance mode.
To operate in SD mode:
- Center the reticle in the eyepiece on the object to measure
- Press Power button again to take the measurement
- To change to the SD mode from another mode, press the Mode button until nothing is visible below the reticle
VD – Vertical Distance Mode. Measures the distance from the Apex Rangefinder to the object. Also measures the elevation difference between the Apex Rangefinder and the object being measured, and the angle of the slope between the object and a horizontal line. The angle and the elevation difference are displayed below the reticle.
- Press Mode button until VD appears below the reticle
- Center the reticle in the eyepiece on the object to measure
- Press Power button again to take the measurement
- The angle and elevation difference will appear below the reticle, and the distance will appear above the reticle.
HD – Horizontal Distance Mode. Displays continual slope distance, angle, and horizontal distance (the distance to a point above or below the object, on a horizontal plane to the Apex Rangefinder). The measurements will be updated continually as the Apex Rangefinder is pointed at different objects.
- Press Mode button until HD appears below the reticle
- Center the reticle in the eyepiece on the object to measure
- Press and hold the Power button to take the measurements
- The angle and elevation difference will appear below the reticle, and the distance will appear above the reticle.
- As you move the Apex Rangefinder to different objects, the continual measurement changes will be displayed in the eyepiece
SP – Speed Measurement. Measures the speed of an object between two points. Object must be travelling toward or away from Apex Rangefinder.
- Press Mode button until SP appears below the reticle
- Speed will be displayed in Kilometers/hour. To change to Miles/hour, briefly press and hold the Power and Mode buttons.
- Center the reticle in the eyepiece on the object to measure
- Press and hold the Power button to begin measuring
- Release the Power button to end the measuring
- The speed will be displayed below the reticle
HT – Two-point Height Measurement. Measure the height difference between two objects.
- Press Mode until HT appears below the reticle
- Center the reticle in the eyepiece on the object to measure
- Press Power button to measure distance to object
- Center the reticle on a second object
- Press the power button again to see the distance to the second object above the reticle, and the height difference below the reticle
CL and FA – Measure the distance of several different objects. Displays the Closest point (CL) or Farthest point (FA).
- Press Mode until either CL or FA appears below the reticle
- Press and hold the Power button to measure distance to object
- While holding the button, point the reticle at the other objects to measure
- The distance to the object currently in the reticle will displayed above the reticle, and the closest or farthest distance of all objects will appear below the reticle
Disc Golf Compensation Mode. Used to calculate the recommended throwing distance after taking the slope and distance into consideration. For example, if the basket is 350 feet away, but up a steep hill, you will need to throw with the power of a 400-foot shot. The Apex Rangefinder shows both the actual distance and the recommended throwing distance.
- Press Mode until the golf flag appears below the reticle
- Center the reticle on the object to measure
- Press the Power button
- The actual distance will appear above the reticle, and the recommended distance will appear below the reticle, along with the angle.
Storage mode – (Lb will show at the bottom of the viewfinder) Used to scroll through the last 20 readings. Displays the most recent distance first.
- Press Mode until Lb (‘Look back’) appears below the reticle
- Press Power repeatedly to scroll through the distances
- The distance labeled ‘01’ is the most recent measurement
Angle Calibration
If it appears that the angle is inaccurate, it can be recalibrated. The angle should be displayed at 0° when a measurement is taken while the Apex Rangefinder is level.
- Press Power button
- Press Mode button until HD appears below the reticle
- Press and hold the Mode button for about three seconds
- Where the angle is displayed in the viewfinder, the word ‘CAL’ will appear
- Place the Apex Rangefinder on a level surface
- Press and hold the Mode button for three seconds
- Keep the Apex Rangefinder on the level surface and press Power mode.
- The angle should appear as 0.0° if calibrated properly
Caution
- Only use 3v battery and make sure it is installed correctly. Excessive voltages may damage the Rangefinder.
- DO NOT look at the sun through the eyepiece. It may cause permanent damage to the eyes, and may damage sensitive parts of the viewfinder.
- Never store the Apex Rangefinder where temperatures will get below -20°c (-4° F) or above 60° (140°F).
- Apex Rangefinder will shut off automatically after about 25 seconds. You cannot turn it off manually.
- The Apex Rangefinder is programmed to compensate for weather to give the best reading in rain/fog. However, the unit must be kept dry to prevent damaging the unit.
Specifications
- Goniometer: Angle Measurement range from -90° to +90°
- Laser Safety: Class 1, Laser wavelength 905nm
- Power Supply: Cr-2 battery (3 volts)
- Precision: 0.1°
- Working Temperature: -20°C to 54°C
- Telescopic Magnification: 6 Times
- Field of View: 7°
- Object Diameter: .94 Inch
- Ranging Error: 1.5 Feet
- Focusing Mode: Manual Focusing Eyepiece
- LCD Display: Transmissive LCD display
- Exit Pupil Diameter: .15 Inch
- Exit Pupil Distance: .47 Inch
- Lens Quality: Multilayer coated glass
- Ranging Method: Semiconductor laser ranging
- Speed Ranging Scope: 4.8-297 Km/t


